DIY Baby Monitor


I recently discovered WebRTC in another project and wanted to try it out in some home project. Since our another home project is nearing it’s delivery, a baby monitor seemed to be in the (very long) list of things to buy.
Our baby will probably be sleeping mostly outside in the baby carriage and I wanted some kind of device with live picture thats viewable anywhere in the house to keep an eye on him while doing something else. WebRTC seemed to fit the bill since it works wherever a recent enough browsed is available like in the Android tablet we have in the space between our kitchen and the living room. I tried to use ready software and 3D-printable parts wherever possible to make something usable fast.
Hardware
The device is standard Raspberry Pi 2 with camera. Since Pi2 does not have
internal wlan like Pi3, I added an external adapter. TP-Link TL-WN725N was used for its small size.
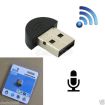
Microphone 1
For the microphone, I searched eBay and found seemingly perfect microphone that was about the size of the wlan adapter (see picture). When the mic finally arrived, the test was disappointing. The mic picked up interference probably from the wlan adapter so much that it was unusable.
After the second round at eBay I found good (read: cheap) alternative, but it had cumbersome gooseneck. Fortunately the gooseneck could easily be gutted out and the whole mic fitted inside the case. To save space, I soldered the mic circuit board directly to one of the usb connectors on the RPi.
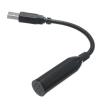
Microphone 2
Powering the device seemed a bit more difficult at first. Since this was supposed to be quick and easy project, I didn’t want to spent time making battery and charging circuit. Luckily, phone battery bank I owned (MyCharge Razor) had about the same footprint as RPi. To power the RPi one has to only connect the usb cable. As an added bonus, it can be charged with regular phone charger and it even has a charge indicator.
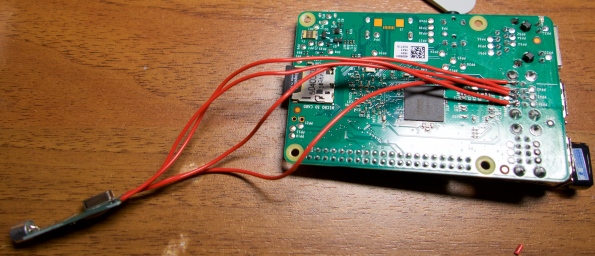
Microphone soldered to USB port
Software
The software centers around Janus WebRTC gateway. Raspivid produces video to GStreamer, which streams the video to local udp socket. Janus reads the video and serves it to connected clients. Second GStreamer instance records audio from the microphone and streams it also to local udp socket which Janus listens. Finally Nginx webserver is there to serve the initial web page which the clients load.
Installing and configuring the needed applications are well documented here: https://planb.nicecupoftea.org/2015/07/28/hackspacehat-part-1-webrtc-janus-and-gstreamer/
I modified streamingtest.html web page in Janus examples so that the streaming will start when the page is opened. See vauva.html and vauva.js in the repository: https://github.com/JanneMantyharju/babymonitor
Finally the following commands were placed to /etc/rc.local to start the streaming on boot:
raspivid --verbose --nopreview -hf -ex nightpreview --width 640 \
--height 480 --framerate 30 --bitrate 1000000 --profile baseline \
--timeout 0 -fl -g 4 -o - | gst-launch-1.0 -v fdsrc ! h264parse ! \
rtph264pay config-interval=1 pt=96 ! udpsink host=127.0.0.1 port=8004 &
gst-launch-1.0 alsasrc device="hw:1,0" ! audioamplify amplification=1 \
! opusenc ! rtpopuspay ! udpsink host=127.0.0.1 port=8005 &

/opt/janus/bin/janus -F /opt/janus/etc/janus/ &
During the testing, I wrote this small script to add a touch of realism in form of endless baby cry:
while true; do
    gst-launch-1.0 filesrc location=/home/pi/baby-crying-01.wav \
    ! wavparse ! audioconvert ! audioresample ! opusenc ! rtpopuspay \
    ! udpsink host=127.0.0.1 port=8005
done
Case
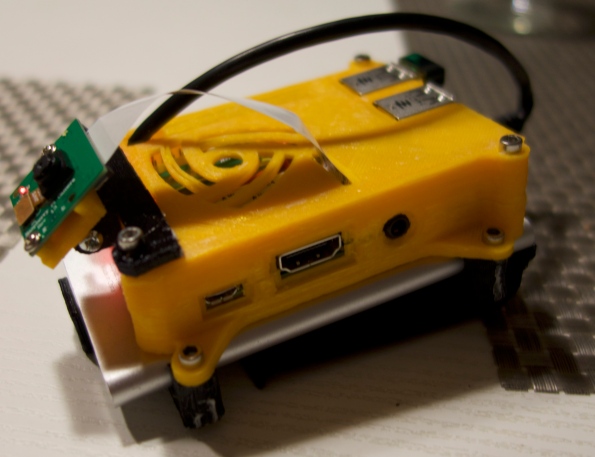
Finished device. Looks quite engineerish, doesn’t it?
For the case, I started with this awesome RPi case. For the camera, I made separate plate to fix the camera on (rpi-camera_plate.stl in the repository) and camera mount (rpi-camera_mount.stl), which fixes to the case screws. This way the camera angle can be adjusted.
The battery bank holder fixes to vesa mount points in the original case. The holder has a large clip on the other side. The baby monitor is meant to be attached to the hood of the baby carriage, so that the camera point down to the baby.
Since resulting device looked exactly something that engineer would come up with, Suvi wrapped it with comfy knitted sock with matching colors to the blanked on the carriage.


Results
I’m really happy with the results. The project was quite straightforward, only problems were with the 3D-printer, which decided to act up when trying to print the clip. I have to admit that with the knitted sock, it doesn’t even look that bad!

I think I should write up a howto on using gst-rpicamsrc and gst-rtsp-server to do the serving without Janus 🙂
Please do, the simpler the better. I have used the same setup on rc-planes to stream the video where simpler streaming path would mean less lag!
Cool! We had a rather similar idea, which resulted in gonimo.com. Landing page is currently in german only – jump directly to the alpha version via https://dev.gonimo.com. It’s already a fully working browser-based baby monitor, alpha quality, looks still ugly and usability is still a nightmare – but it works 😉